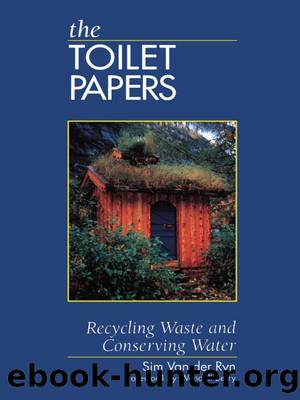
The Toilet Papers by Sim Van der Ryn

Author:Sim Van der Ryn
Language: eng
Format: epub
Tags: ebook, book
ISBN: 9781603581301
Publisher: Chelsea Green Publishing
Published: 2011-02-27T00:00:00+00:00
Chapter 5.
Household Composting
The idea of composting your own waste is intimately tied to managing all wastes in your household. Together with the composting privy, these form an integrated approach to recyling all organic wastes. Notes on aerobic methods and design of composting bins were prepared by Bill and Helga Olkowski.
CHOOSING A LOCATION AND MAKING BINS
If possible, select a shady place so the piles will not dry out too quickly. The north side of the house or garage is often perfect. The ideal setup would be a ground area three or four feet wide and from nine to twelve feet long so at least three wooden bins can be constructed, each approximately a cubic yard in size.
The fronts of the bins should be made of removable boards, allowing easy entry as the contents are emptied. The sides and floor of the bins should fit as tightly as possible so bits of organic matter cannot fall through and provide overlooked fly breeding material underneath and outside the bins. Fit the lids tightly to keep out the rain. Keep one bin for storage of matter to be compostedâgeneral garden debris, but not manures or kitchen garbageâwhile you toss the going pile back and forth with a pitchfork between the two remaining bins.
You can expect your compost, made by the following method, to take about three weeks to complete.
Building the Pile
Start with some absorbent material on the bottom of the bin. Sawdust is good and you can easily obtain it from lumber yards, cabinet shops, high school woodworking classes. Then put down layers of green and dry matter and manure, if you are using it. If you use some other nitrogen source, sprinkle it over the layers as you go along. Make a three to five inch layer of each of your materials until the bin is full.
The smaller the size of the materials you put in, the more surface area you expose, and the faster the pile will decompose. For this reason you may wish to chop up coarse materialsâmelon rinds, dry weeds, stalks or strawâinto shorter lengths (five to eight inches) with a cleaver.
When you have finished building the pile, you should have about a cubic yard of material. A smaller pile will not hold the heat adequately; a larger one is rather much to turn.
After you have built your pile, you may need to water it. It should be moist but not too wet, as there needs to be plenty of air throughout the pile. No liquid should run out the bottom. If this should happen at any time, put a thick layer of sawdust into the adjoining bin and turn the pile over into that bin to trap the juices.
Turning the Pile
After you have built the pile, let it sit a day or so. Then, with a pitchfork turn the compost into the neighboring bin, examining it while you do so. Turn the top, bottom and sides of the old pile into the center of the new bin, the center of the old around the edges of the new.
Download
This site does not store any files on its server. We only index and link to content provided by other sites. Please contact the content providers to delete copyright contents if any and email us, we'll remove relevant links or contents immediately.
Whiskies Galore by Ian Buxton(41967)
Introduction to Aircraft Design (Cambridge Aerospace Series) by John P. Fielding(33106)
Small Unmanned Fixed-wing Aircraft Design by Andrew J. Keane Andras Sobester James P. Scanlan & András Sóbester & James P. Scanlan(32779)
Craft Beer for the Homebrewer by Michael Agnew(18218)
Turbulence by E. J. Noyes(8003)
The Complete Stick Figure Physics Tutorials by Allen Sarah(7352)
Kaplan MCAT General Chemistry Review by Kaplan(6916)
The Thirst by Nesbo Jo(6909)
Bad Blood by John Carreyrou(6601)
Modelling of Convective Heat and Mass Transfer in Rotating Flows by Igor V. Shevchuk(6421)
Learning SQL by Alan Beaulieu(6264)
Weapons of Math Destruction by Cathy O'Neil(6248)
Man-made Catastrophes and Risk Information Concealment by Dmitry Chernov & Didier Sornette(5981)
Digital Minimalism by Cal Newport;(5740)
Life 3.0: Being Human in the Age of Artificial Intelligence by Tegmark Max(5534)
iGen by Jean M. Twenge(5398)
Secrets of Antigravity Propulsion: Tesla, UFOs, and Classified Aerospace Technology by Ph.D. Paul A. Laviolette(5358)
Design of Trajectory Optimization Approach for Space Maneuver Vehicle Skip Entry Problems by Runqi Chai & Al Savvaris & Antonios Tsourdos & Senchun Chai(5055)
Pale Blue Dot by Carl Sagan(4984)
